Showing posts with label Applique quilt. Show all posts

Tuesday, April 15, 2014

'Behind the scenes' in Craft Land Workroom

Long Arm Quilter


Hello everyone from Christel and the ‘behind the scenes’ team, Amir, Jocelyn and Ailyn, in the My Craftland workroom. We are based in Al Khor, where we make some of the items for the shop to help inspire fellow crafters.

Latest Quilt hanging in Jumeirah hop


For the quilting ladies, we prepare the Layer Cakes, Jelly -, Mini and Maxi rolls and some of the beautiful quilts you will see hanging on the walls in the Jumeirah shop.
 
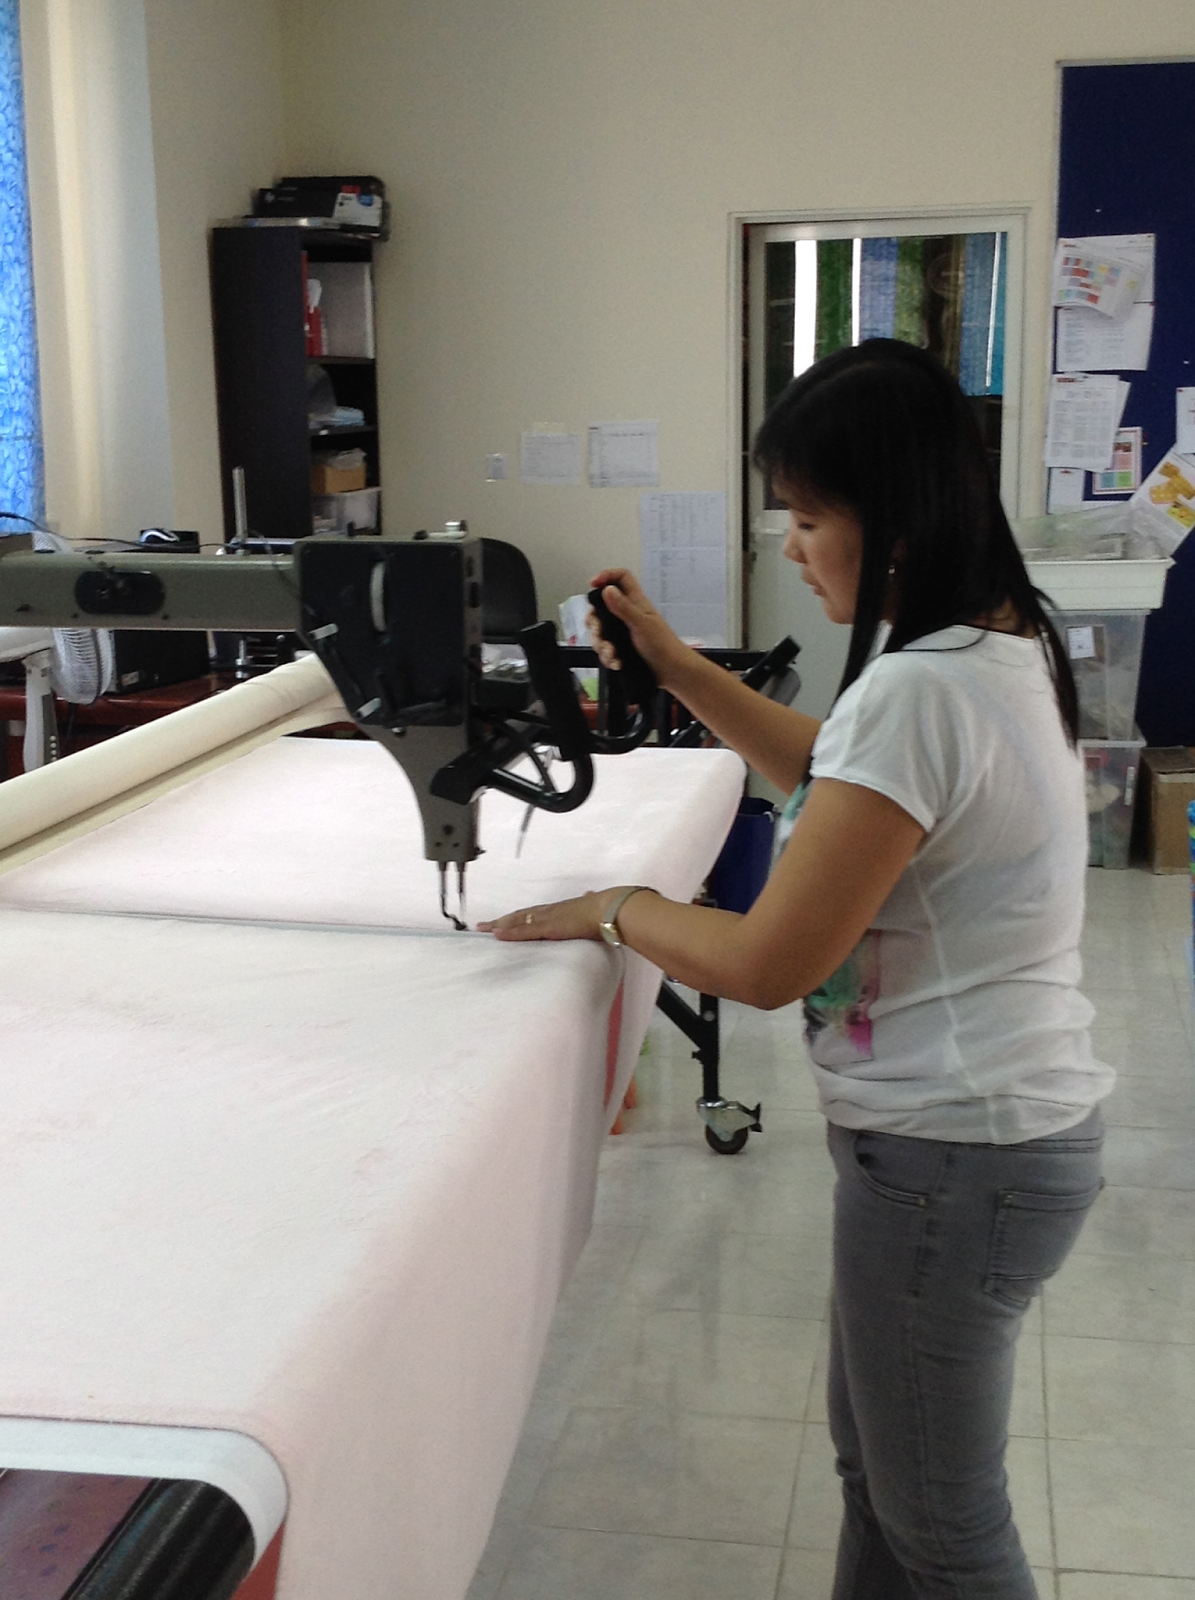
This is also where we sew quilt top, batting and backing together on the long-arm quilting machine for our customers and at a request can finish the quilt by sewing the binding.


Jocelyn and Amir making Jelly Rolls for the shop


Another part of our responsibilities are to assist Danielle and the teachers in the shop by making kits for the clubs on Wednesday mornings and also more Embroidery kits that you can choose to buy in the shop and either make at home or come to a class or clinic.


Amir has inspired us all with this quilt he made mostly by hand stitching!


Sunday, October 27, 2013

Appliqué tutorial


Hello! 

Let me first introduce myself; I'm Stephanie Deaves, sewing and quilting teacher at Craftland. I moved to Dubai, with my husband, 2 years ago after completing my degree in Textile Design at the University of the Arts, London. My degree was about taking an experimental and creative approach to textile design, bringing together ideas and conceptual development, whilst exploring the application of textiles within fashion and interior design. I now design and make my own range of accessories which I sell in and around Dubai. If you would like to know a bit more about me and my work you can visit my blog here.

I have been teaching at Craftland for a year and a half now and I love it! To be surrounded by creative minds, fabric and threads all day is a real treat ...the only downside being that I can't seem to leave without buying something (my husband doesn't share my love of rulers and scissors)!

For this blog post, I thought I'd share a couple of quilts I've made recently; my 'Monsieur Saucisson' quilt and 'Movember' quilt. They are both made using appliqué, and I have included a simple, easy to follow tutorial about appliqué in this post. Appliqué is a fantastic technique for personalising any project.

'Monsieur Saucisson'

So, anyone that knows me will know how much I love sausage dogs! The super cute sausage in this photo is called 'Dash', and sadly, no, he does not belong to me. He was the perfect model!


'Movember'

The idea behind this quilt was 'If you can't grow one, sew one!'

November is just around the corner, so get started on your 'Movember' quilt now!


Appliqué tutorial:


1. What you'll need:

  • Background fabric (something quite plain so your appliqué will be clear)
  • Fabric for appliqué (this can be patterned)
  • Fusible web (paper backed)
  • Co-ordinating thread (I usually go slightly darker than my appliqué fabric)
  • Template (you can draw your own or print a picture from the internet. Remember you will have to stitch around this, so make sure it does not have too many small details! Also, keep the image simple and quite stylised as it must be an easily recognisable outline)
  • Sewing supplies (sewing machine, scissors, pins, iron)


Template tips


2. Fusing your shape to a backing fabric:

Once you have picked your template, trace the outline onto the paper side of your fusible web (remember your image will be reversed). Then trim roughly around the outline. 

Iron the fusible web onto the wrong side of your appliqué fabric (the rough side of the fusible web is the adhesive side). Cut your shape out, peel the paper off the back, place it on your background fabric and iron it in place.


3. Stitching around your shape:

You have a few choices when it comes to selecting a stitch. You can use straight stitch for a 'messier' look as the raw edge will be visible, zig zag or blanket stitch, which gives a neater finish as the raw edges are sealed in the stitch.


I have chosen to use blanket stitch. I have chosen a slightly darker thread than the colour of my fabric so it gives the shape a bolder outline. 

When using blanket stitch, try to keep the straight line part of the stitch perfectly in line with the raw edge of your shape. When sewing curves, remember, needle down, presser foot up and slightly pivot the fabric. Only change direction when your needle is on the edge of the fabric. You can adjust the size of the stitch according to the size of your shape by changing the stitch length and width. 

Try a practice piece first! 

Secure your thread ends with either a couple of back stitches or thread your top threads into a needle, take them to the back of the fabric, tie them in a knot and trim the excess.


5. It's as easy as that! A few more and you have a quilt...


If you need any help, come along to a clinic at Craftland (you can check the schedule here). We are happy to help with any problems or questions ...or just come and show us what you're working on!